
I wrote in a previous post, that I have a friend & coworker who is a MAC makeup artist, named Andy Travis. Before I featured him in an interview, but this time I got to sit down with him & have a makeup tutorial with him! Below you will see advice which comes from him; below I’ve listed affordable makeup / tool options you can get!
What I learned from him:
-On putting on liquid foundation:

DO: Use a flat brush with synthetic fibers. (Synthetic fibers absorb less makeup than natural ones) Put some of the amount of foundation on the back of your hand, & use a flat brush to dab into the makeup; & then lightly pat it, or dab it on your face.
DON’T: Put the foundation directly on your face, & then brush it out. This way you are wiping off all the makeup, & wasting your money.
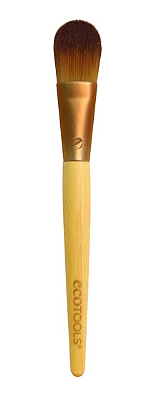
-When applying makeup with brushes:

DO: Try to hold them towards the end of the brush. Once you’re in the habit of it, you develop more flexibility & gracefulness in using brushes.

DON’T: Hold them towards the front end of the brush, like a pen or pencil. When you hold them close to the front, you lose a lot of the dexterity that you could have with the brush. When you hold the brush with your hand further towards the end, it also gives you more control.
-When washing your brushes:

DO: hold them at an angle, while your rotate the brush in the palm of your hand. Usually when washing brushes, you should put some soap in the palm of your hand, & rub the bristles under the faucet. You can even use dishwashing detergent to clean your brushes! Why spend lots of money on brush soap when you can get dishwashing detergent for $1?

DON’T: Smush the brush into the palm of your hand when washing them. Actually don’t ever do this with your brushes. This ruins the integrity of the brush, & is more likely to cause the bristles to fall out. When you hold them at an angle, & rotate it, it naturally causes the makeup to come out with soap & water.
-When putting on eye makeup & foundation:

DO: Put on eye makeup first. Put on your eye makeup on first, & you can clean up ANY fall out you may have, before you put on the rest of your makeup. Any girl who’s put on mascara, knows that you might get some of it on your eyelids.
DON’T: Put your foundation & other makeup on first. I once watched a video once where a makeup artist do ALL of her foundation & contouring, then her eyes last. She actually stuck on pads under her eyes to prevent the fall out from putting on eye makeup. But why waste your time & money? Do the eye makeup first, clean up any fall out (with a bit of makeup remover, makeup wipe, or a q-tip) and THEN put on your foundation (and / or blush, or contouring).
-Maintain healthy skin & stay hydrated:

DO: Moisturize, exfoliate, & take care of your skin. Makeup on top of dead skin does make you look older. And he also told me that people who are dehydrated, tend to have darker circles under their eyes.
DON’T: obviously neglect your skin. A lot of women have this misconception that the more makeup, the better. But no makeup can replace great, healthy looking skin, which comes naturally.
-Use an eye and / or face primer to make your makeup last:


E.L.F. eye primer & liner sealer, $3
DO: Use an eye primer before putting on eyeshadow, for this will help your makeup last. There are clear eye primers, but best to get one close to your skin color. If you are unable to find an eye primer close to you skin tone, you can always use a concealer as a primer! This also gives your eyes an even canvas for you to put on makeup. For long lasting foundation, put on a face primer. For normal/dry skin, you would need a moisturizing primer, whereas oily skin you would need a mattifying one.
-Put on your lip color before blush:

DO: Put on your lipstick first before putting on blush. Best to pick colors that are within the same family & prevents the colors from clashing.
DON’T: pick colors that don’t match. Obviously if you have a red lip, you wouldn’t put on orange blush.
-Understand where your cheekbones when putting on blush:


DO: know that they begin at the front of your ears, & end directly below the center of your eyes. When putting on blush, you should start by putting it directly on the center of your cheeks. Don’t know where they are? Smile, & put the blush directly on the center. Then, relax your face, & using your blush brush, use a light swiping motion back & forth dusting the blush on your cheeks.
DON’T: put blush on too high or too low. You want the color directly on your cheeks, not look like you have pink patches on your face.
Was this insightful? Check back if I have another tutorial with Andy! And I’ll be adding more to this page when I do! Check out his website for more information or to contact him!


One thought on “Inside my tutorial with a MAC makeup artist!”